 Save
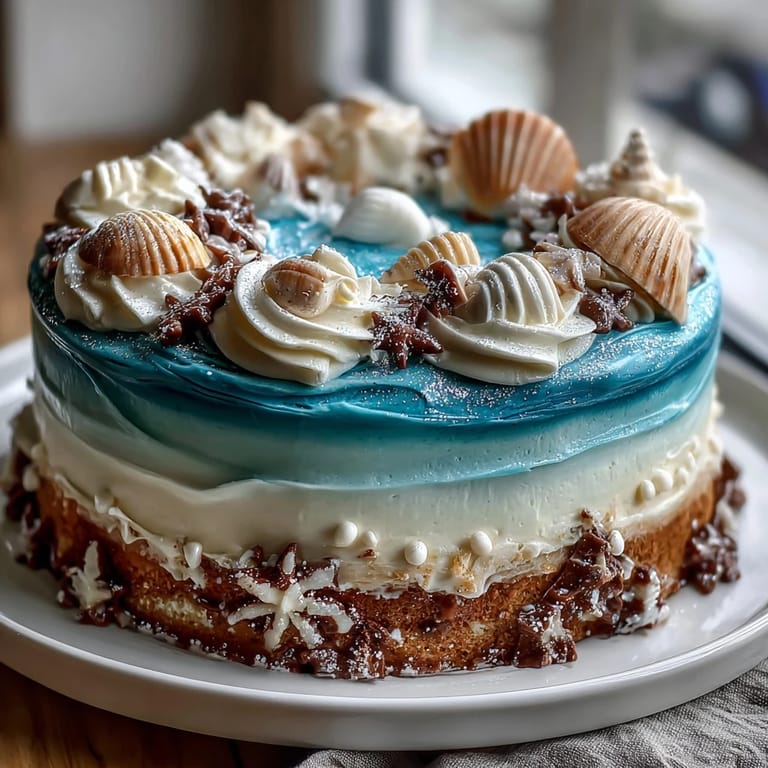
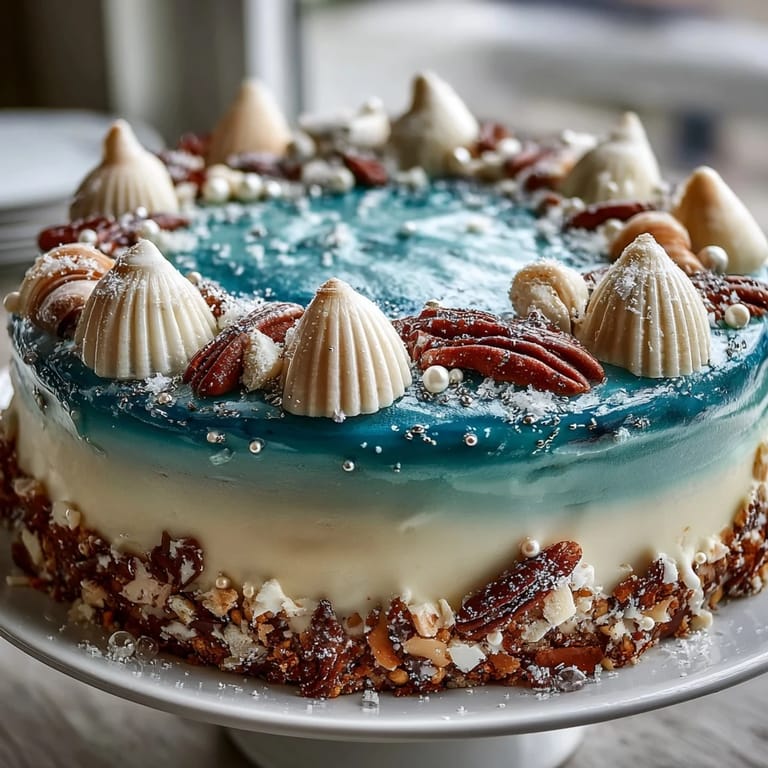
Save My friend texted me a photo of her zodiac sign—Pisces—and asked if I could bake something that captured that dreamy, oceanic energy for her birthday. I'd never attempted an ombre cake before, but something about the challenge clicked. Hours later, watching those blue gradients blend from sky to seafoam to deep navy felt like painting with frosting, and when she walked in and gasped, I knew exactly why bakers fall in love with this kind of magic.
I'll never forget my mom's face when I brought this cake to her book club—she didn't believe I'd made it until she tasted how tender the crumb was. One of her friends asked for the recipe that same night, and now I've made six of these for various celebrations. There's something about watching people photograph their slice before eating it that makes all the mixing and frosting worth the effort.
Ingredients
- All-purpose flour (2 ½ cups): The foundation of your sponge—sift it with the leavening agents to ensure an airy crumb that won't feel dense or heavy.
- Baking powder (2 ½ tsp): This is your lift, so make sure it's fresh and not clumped; old baking powder won't give you the rise you're counting on.
- Salt (½ tsp): A pinch that brightens the vanilla and balances sweetness in ways you won't consciously notice but absolutely will miss if forgotten.
- Unsalted butter (¾ cup for cake, 1 ½ cups for frosting): Room temperature is non-negotiable—cold butter won't cream properly and you'll end up with a grainy batter.
- Granulated sugar (1 ¾ cups): Creaming this with butter for several minutes creates tiny air pockets that become your cake's tender structure.
- Eggs (4 large, room temperature): Temperature matters because cold eggs won't emulsify smoothly into the batter and can cause curdling.
- Pure vanilla extract (1 tbsp for cake, 2 tsp for frosting): The soul of this cake—imitation extract tastes flat by comparison, so invest in real vanilla.
- Whole milk (1 cup for cake, ¼ cup for frosting): Room temperature milk blends seamlessly; cold milk can seize the batter and create lumps.
- Powdered sugar (6 cups, sifted): Sifting removes lumps and aerates, preventing grainy frosting that breaks when you spread it.
- Blue gel food coloring: Gel stays vibrant without thinning your frosting like liquid coloring does—a single drop goes surprisingly far.
Tired of Takeout? 🥡
Get 10 meals you can make faster than delivery arrives. Seriously.
One email. No spam. Unsubscribe anytime.
Instructions
- Prepare your pans and preheat:
- Set your oven to 350°F and line three 8-inch pans with parchment—this prevents sticking and lets you release layers with confidence. Grease the paper lightly so nothing catches.
- Mix your dry ingredients:
- Sift flour, baking powder, and salt together into a medium bowl; this aerates everything and distributes leavening evenly. Set aside and let it settle for a moment.
- Cream butter and sugar:
- In a large bowl, beat softened butter with sugar for 3-4 minutes until the mixture looks pale, fluffy, and almost mousse-like. This is where your cake gets its tender crumb, so don't rush this step.
- Incorporate eggs and vanilla:
- Add eggs one at a time, beating after each addition until fully combined before adding the next. Pour in vanilla and mix just until integrated.
- Alternate wet and dry additions:
- Add flour mixture in three additions, alternating with milk and always starting and ending with flour. Stir only until combined—overmixing develops gluten and toughens the cake.
- Divide and bake:
- Pour batter evenly among pans and smooth the tops with a spatula. Bake 25-30 minutes until a toothpick comes out clean and the edges pull slightly from the pan.
- Cool properly:
- Let cakes rest in pans for 10 minutes to set, then turn onto wire racks and cool completely. Warm cake layers are fragile and will crumble when stacked.
- Make your frosting base:
- Beat softened butter until creamy, then gradually add sifted powdered sugar a cup at a time, beating well between additions. Add vanilla and salt, then milk slowly until you reach a smooth, spreadable consistency.
- Create your ombre gradient:
- Divide frosting into four bowls and tint each with blue gel coloring, starting with a barely-there pale blue and progressing to deep ocean blue. Each shade should look distinctly different when swatched.
- Stack and crumb coat:
- Place your first cake layer on a plate and spread the palest blue frosting in a thin layer—this is your crumb coat that traps loose crumbs. Repeat with remaining layers, using slightly darker blue each time.
- Apply the ombre finish:
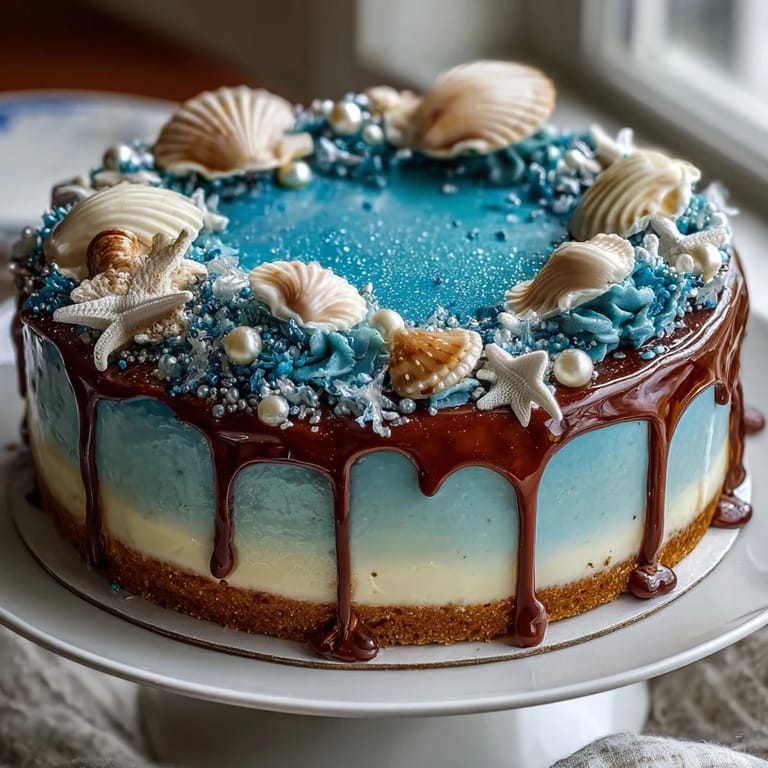
- Using an offset spatula, frost the top and sides, starting with the lightest blue at the peak and gradually blending toward deeper shades as you move down. Blend where colors meet for a seamless gradient effect.
- Decorate and chill:
- Add white chocolate seashells, edible glitter, and sprinkles if desired, then refrigerate for 30 minutes before slicing. The chill sets the frosting and makes clean cuts possible.
 Save
Save The moment I realized this cake had become something special was when my nephew, who claims to hate vanilla cake, asked for a second slice. His Pisces mom watched him discover that moist, delicate crumb and her eyes actually teared up—not because of the cake, but because her kid was eating something I'd made with her in mind.
The Ombre Technique That Looks Harder Than It Is
The ombre effect intimidated me the first time, but it's genuinely forgiving once you understand the principle: you're working from light to dark, and slight color transitions look intentional and beautiful. The key is not overthinking the blending—a few gentle swirls with your spatula create depth and dimension without looking artificial. I discovered that tasting a tiny bit of frosting from each bowl before frosting helps you visualize the final gradient and prevents mistakes.
Optional Additions That Transform Everything
The base recipe is perfect as-is, but small tweaks can elevate it based on your mood or the person you're baking for. A tablespoon of lemon zest mixed into the batter adds brightness that plays beautifully against vanilla and frosting sweetness. Simple syrup brushed onto cake layers before frosting creates an extra layer of moisture that keeps slices tender even after a few days in the fridge.
Storage, Serving, and Pairing Ideas
This cake improves slightly as it sits—the flavors meld and the layers settle into even more tender slices by day two. Store it in an airtight container at room temperature for up to three days, or freeze unfrosted layers for up to a month if you want to frost fresh for a gathering. The delicate vanilla pairs beautifully with sparkling Moscato, chamomile tea, or even a light herbal blend that echoes that dreamy Pisces energy.
- Chilling the frosted cake for 30 minutes before slicing prevents layers from sliding and ensures clean cuts that show off your ombre work.
- White chocolate seashells and edible glitter aren't just pretty—they hint at the ocean without overwhelming the vanilla flavor.
- If decorating ahead, frost and chill overnight, then add delicate toppers a few hours before serving so they stay pristine.
 Save
Save Every time someone bites into this cake, they taste the care that went into those ombre layers and tender crumb, but more than that, they feel celebrated. That's what this cake is really for—making birthdays feel a little more magical.
Recipe FAQs
- → How is the blue ombre effect achieved?
The frosting is divided into portions and tinted with varying shades of blue gel food coloring, then applied gradually from light to dark to create a seamless gradient.
- → What makes the vanilla sponge moist?
Using softened butter, fresh eggs, and properly alternating flour with milk during mixing helps maintain a tender and moist crumb.
- → Can I prepare the layers in advance?
Yes, cake layers can be baked ahead and wrapped tightly, then chilled or frozen until ready to frost and assemble.
- → Are there any decorating tips for the seashells and glitter?
White chocolate seashells and edible glitter add texture and shimmer; apply after frosting and before chilling to help set decorations firmly.
- → What tools are needed for smooth frosting application?
An offset spatula and a turntable help spread buttercream evenly and create clean edges for the ombre effect.