 Save
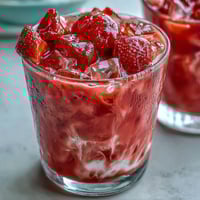
Save The smell of white chocolate and strawberries hit me before I even tasted one. My niece had begged for something pink, something sweet, and something she could help make without turning on the oven. I pulled out a can of condensed milk, a bag of freeze-dried berries, and we went to work. The result was so startlingly good that I made three more batches that week, each time tweaking the strawberry intensity until we landed on something that tasted like summer in fudge form.
I brought a tray of these to a potluck once, and they disappeared faster than anything else on the table. People kept asking if I had used fresh strawberries or some fancy couverture chocolate. The truth is, freeze-dried powder does all the heavy lifting, delivering concentrated berry flavor without adding moisture that would ruin the fudge. One friend later texted me at midnight asking for the recipe because her daughter had declared it better than store-bought fudge, which felt like the highest compliment a nine-year-old could give.
Ingredients
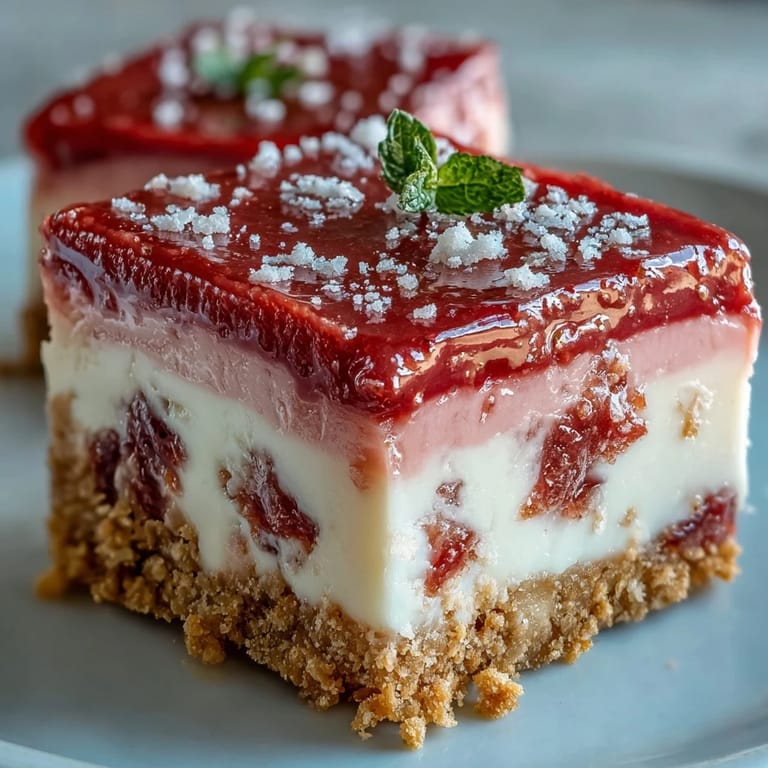
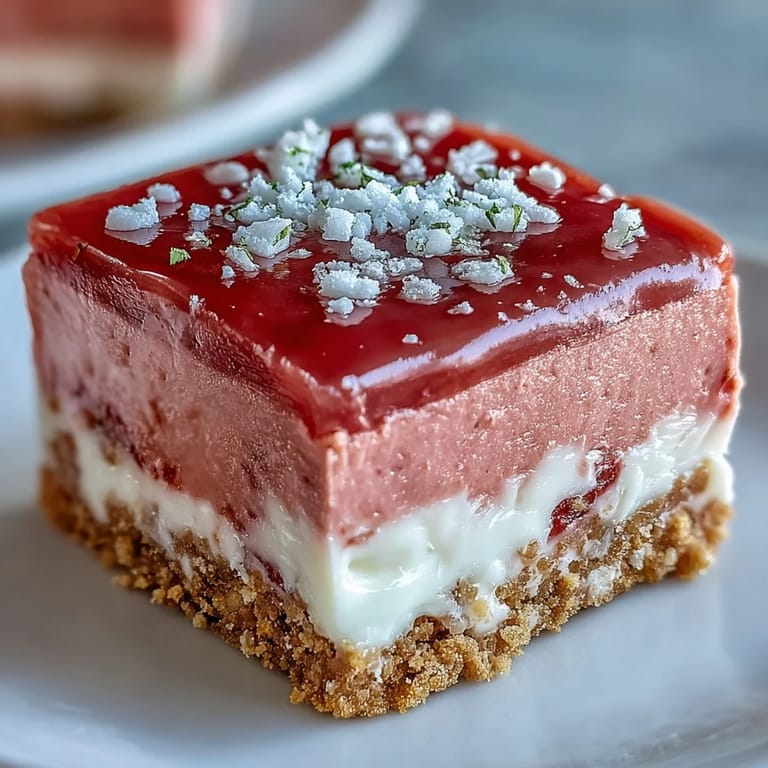
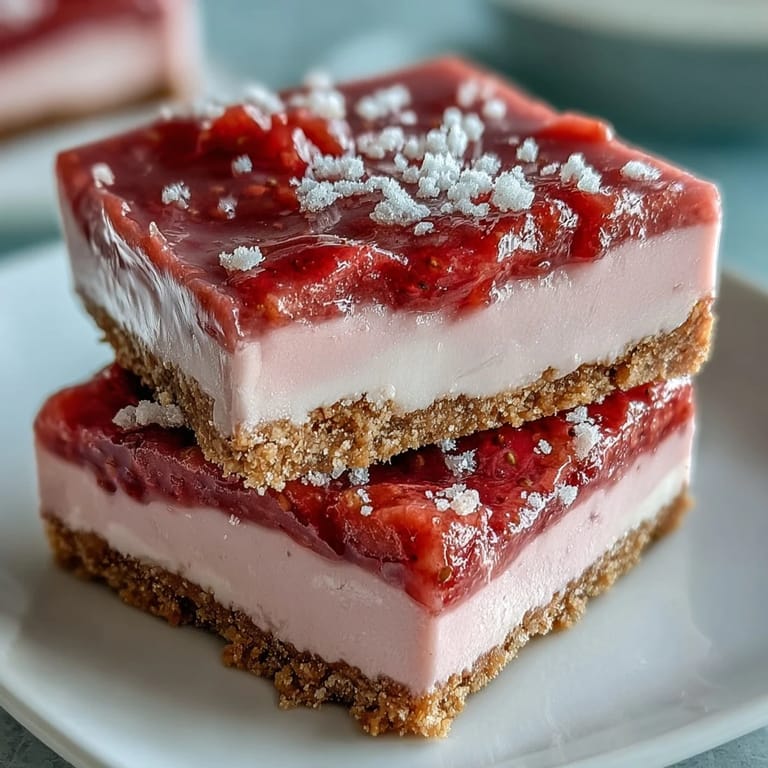
- Digestive biscuits or graham crackers: Crushed fine, they form a sturdy base that contrasts beautifully with the creamy layer above, and you can swap in any plain crisp cookie if that is what you have on hand.
- Unsalted butter: Melted and mixed into the crumbs, it binds everything together without making the crust greasy, so use real butter for the best texture.
- White chocolate chips or chopped white chocolate: The backbone of the fudge layer, providing sweetness and a silky melt that holds the strawberry flavor in suspension.
- Sweetened condensed milk: This is what gives the fudge its signature dense, creamy consistency, and one can is exactly the right amount for a perfectly balanced square.
- Freeze-dried strawberries: Ground to a powder, they deliver intense berry flavor without watering down the fudge, and you can control the color and taste by adjusting the quantity.
- Pure vanilla extract: A teaspoon rounds out the sweetness and enhances the strawberry notes without competing with them.
- Pinch of salt: Balances the sugar and sharpens the berry brightness, making the whole thing taste more alive.
- Pink or red gel food coloring: Optional, but a drop or two turns the fudge into something that looks as cheerful as it tastes.
Tired of Takeout? 🥡
Get 10 meals you can make faster than delivery arrives. Seriously.
One email. No spam. Unsubscribe anytime.
Instructions
- Prepare the pan:
- Line your square pan with parchment, letting it hang over two sides like little handles. This makes lifting out the finished fudge so much easier, and you will thank yourself when it is time to slice.
- Make the crust:
- Stir crushed biscuits and melted butter until every crumb is coated and the mixture clumps when you squeeze it. Press it firmly and evenly into the pan, then chill for ten minutes so it sets up before you add the fudge layer.
- Melt the chocolate base:
- Set a heatproof bowl over simmering water and add white chocolate and condensed milk, stirring gently until smooth. The double boiler keeps the chocolate from scorching, so do not rush this step.
- Flavor the fudge:
- Off the heat, stir in strawberry powder, vanilla, salt, and food coloring if you are using it. Mix until the color is uniform and the powder is fully dissolved with no dry streaks.
- Assemble and chill:
- Pour the pink mixture over the chilled crust and spread it evenly into the corners. Cover loosely and refrigerate for at least two to three hours until firm enough to slice cleanly.
- Slice and serve:
- Lift the fudge out using the parchment, then cut into sixteen squares with a sharp knife, wiping the blade between cuts. Garnish with fresh strawberry slices or extra freeze-dried pieces if you want to make them look fancy.
 Save
Save One evening, I made a batch and left it in the fridge overnight. The next morning, I found my partner sneaking a square with his coffee, and he admitted he had been thinking about them since he went to bed. That is when I knew this recipe was a keeper. It is the kind of treat that lingers in your mind long after the pan is empty, and people always ask when you are making it again.
How to Store and Serve
Keep the squares in an airtight container in the fridge for up to five days, stacking them between layers of parchment if you need to save space. They taste best when slightly chilled, but if you let them sit at room temperature for about ten minutes before serving, the texture softens into something almost truffle-like. I have also frozen them for up to a month, wrapping each square individually in plastic wrap, and they thaw beautifully in the fridge overnight.
Flavor Variations to Try
Once you have the base recipe down, you can play with the fruit. Swap freeze-dried raspberries for a tart twist, or blend in a handful of crushed freeze-dried blueberries for a purple marbled effect. I once stirred in a spoonful of lemon zest along with the strawberry powder, and the citrus lifted the whole thing into something almost elegant. You can also press mini chocolate chips into the top before chilling for a little textural surprise.
Common Questions and Fixes
If your fudge layer turns out grainy, it usually means the white chocolate got too hot or you used a lower-quality brand with less cocoa butter. Stick to a gentle simmer in the double boiler and buy the best white chocolate you can afford. If the crust crumbles when you slice, you may not have pressed it firmly enough or used enough butter to bind the crumbs together.
- Use a bench scraper or offset spatula to press the crust into the corners for an even layer.
- Warm your knife under hot water and dry it before each cut for the cleanest slices.
- Let the fudge come to room temperature for ten minutes if you want a softer, creamier bite.
 Save
Save These little pink squares have become my go-to when I need something impressive that does not require much effort. Every time I make them, someone asks for the recipe, and I love knowing that something so simple can bring that much joy.
Recipe FAQs
- → Can I use fresh strawberries instead of freeze-dried?
Yes, you can substitute 100g fresh strawberries puréed and strained for the freeze-dried powder. However, fresh strawberries add moisture which may slightly affect the setting time and texture.
- → How long do these need to chill before serving?
The squares need at least 2-3 hours in the refrigerator to firm completely. For best results, let them chill overnight so the fudge layer sets fully and slices cleanly.
- → Can I make these dairy-free?
Absolutely. Substitute dairy-free white chocolate chips and coconut condensed milk for the traditional ingredients. Use coconut oil or dairy-free butter for the crust as well.
- → Why is my fudge layer not setting properly?
This usually happens if the mixture wasn't heated enough to melt the chocolate completely, or if fresh strawberries added too much moisture. Ensure the white chocolate is fully melted and smooth before combining with other ingredients.
- → How should I store these squares?
Keep in an airtight container in the refrigerator for up to 5 days. The cold temperature maintains the fudgy texture. You can also freeze them for longer storage—thaw in the refrigerator before serving.
- → Can I use different biscuits for the crust?
Yes, digestive biscuits, graham crackers, vanilla wafers, or even Biscoff cookies work well. Just ensure they're finely crushed to create an even, compact base layer.