 Save
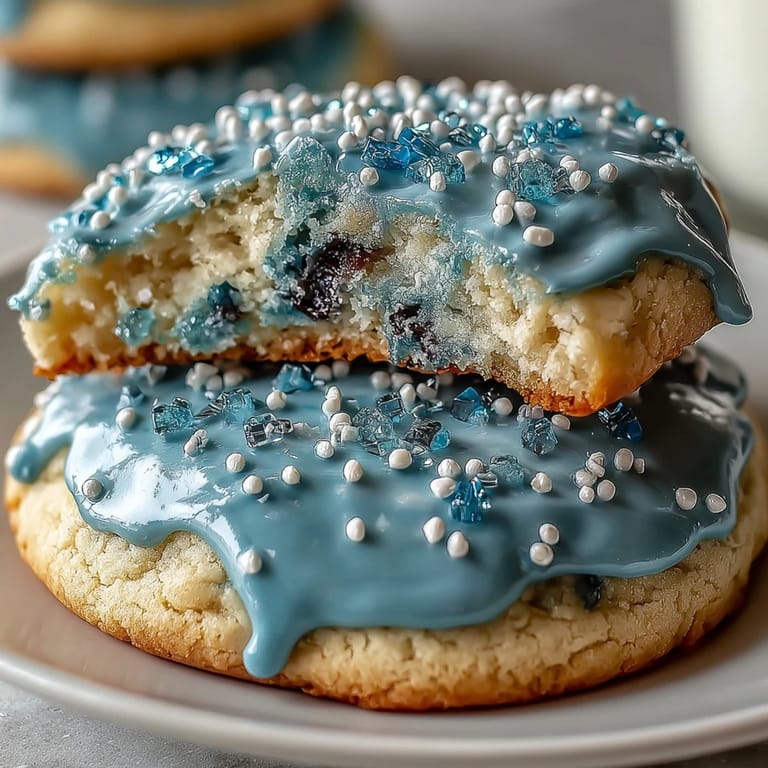
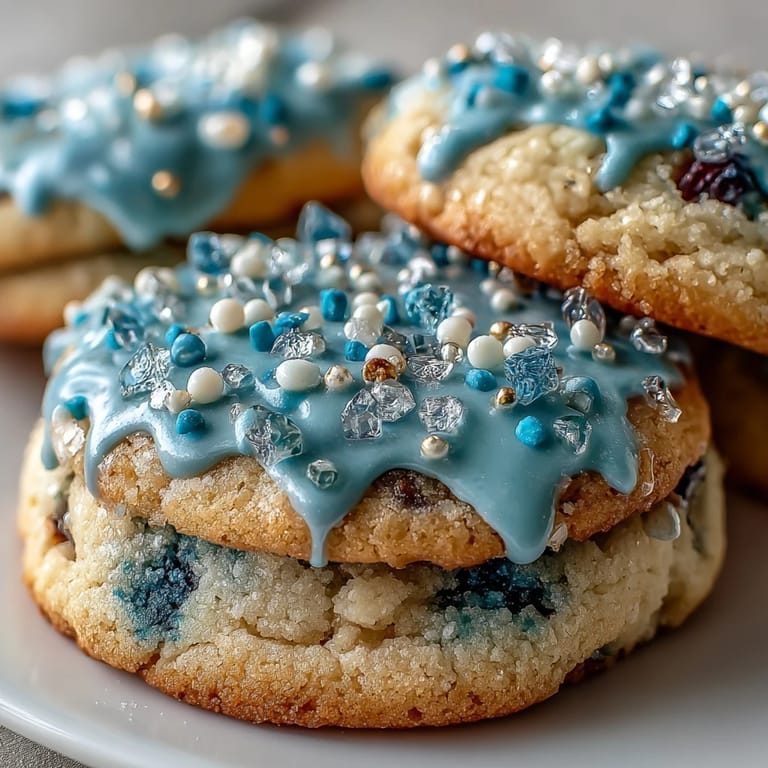
Save My friend sent me a screenshot of Pure Vanilla Cookie from Cookie Run Kingdom one ordinary Tuesday, and something about those soft, elegant blue and white details made me want to bake. I found myself pulling out my mixing bowls that evening, not because I needed desserts, but because the character felt like an invitation to create something beautiful and delicate. These sugar cookies with their glossy royal icing remind me of that impulse—the sudden urge to make something that looks as good as it tastes, purely for the joy of it.
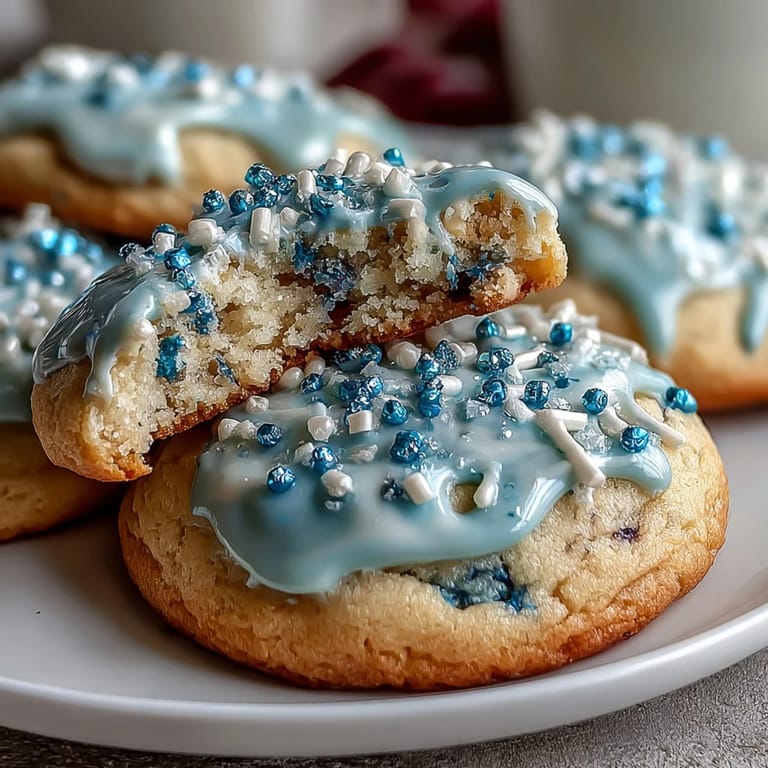
I made a batch of these for my niece's birthday party, and watching her friends photograph their cookies before eating them told me everything I needed to know. The blue and white color scheme pulled directly from the game theme meant kids recognized the character instantly, which somehow made plain vanilla cookies feel like a special reveal. That moment when someone's face lights up because you remembered a detail they care about—that's what this recipe delivers.
Ingredients
- All-purpose flour (2 1/2 cups): The foundation that keeps these cookies tender rather than tough; measure by spooning and leveling, or weigh it if you want consistency across batches.
- Unsalted butter (3/4 cup), softened: Softness matters here because it incorporates air when you cream it with sugar, giving the cookies that slight lift and delicate crumb.
- Granulated sugar (1 cup): This is what makes the dough workable and gives the cookies their slight structure without making them cakey.
- Baking powder (1/2 tsp): A gentle leavening agent that helps the cookies rise just enough to be tender and slice-able when decorated.
- Large egg: Binds everything together and contributes moisture; room temperature eggs mix more evenly into the dough.
- Pure vanilla extract (2 tsp for dough, 1/2 tsp for icing): The subtle backbone that makes people say these taste like childhood, even if they can't place why.
- Salt (1/4 tsp): Rounds out the vanilla and sugar so the cookies don't taste flat or one-dimensional.
- Milk (1 tbsp): A small amount that keeps the dough from being too dry, especially important if your butter was firmer than expected.
- Powdered sugar (2 cups) for icing: Must be sifted to avoid lumps that show in your otherwise glossy icing.
- Meringue powder (2 tbsp): The secret to icing that dries hard and glossy; it prevents the raw egg safety concern and creates that professional look.
- Warm water (4-5 tbsp) for icing: Start with 4 tablespoons and add more one teaspoon at a time until you reach piping consistency.
- Gel food coloring (optional): Gel holds color better than liquid dye and won't thin your icing the way other colorants might.
Tired of Takeout? 🥡
Get 10 meals you can make faster than delivery arrives. Seriously.
One email. No spam. Unsubscribe anytime.
Instructions
- Gather and measure your dry ingredients:
- Whisk together the flour, baking powder, and salt in a medium bowl and set it aside. This pre-mixing ensures the leavening distributes evenly so every cookie rises the same way.
- Cream butter and sugar until fluffy:
- In a large bowl, beat the softened butter and granulated sugar together for about 2 to 3 minutes until the mixture looks pale and billowy. You'll know it's ready when you lift the mixer and the mixture falls in soft ribbons rather than a heavy clump.
- Add your wet ingredients:
- Beat in the egg, vanilla extract, and milk until everything is fully combined and smooth. The dough should look creamy and slightly glossy at this point.
- Bring the dough together gently:
- Add the dry ingredients to the wet ingredients in three additions, mixing on low speed just until the dough comes together. Overmixing develops gluten, which makes the cookies tough instead of tender.
- Chill the dough thoroughly:
- Divide the dough in half, flatten each into a disk, wrap tightly in plastic wrap, and refrigerate for at least one hour. Cold dough rolls out cleanly and holds its shape better in the oven without spreading too thin.
- Prepare your workspace:
- Preheat your oven to 350°F (175°C) and line your baking sheets with parchment paper. A cool surface makes rolling much easier, so if your kitchen is warm, chill your work surface or use a pastry mat.
- Roll and cut:
- On a lightly floured surface, roll out one disk of dough to about 1/4-inch thickness and cut into your desired shapes using cookie cutters. The thickness matters—thinner cookies get crisper edges, thicker ones stay chewier in the center.
- Space and bake:
- Transfer your cut cookies to the prepared baking sheets, leaving about one inch between each. Bake for 10 to 12 minutes until the edges just begin turning golden; the centers should still look barely done.
- Cool with patience:
- Let cookies rest on the baking sheet for five minutes to set, then transfer them to a wire rack to cool completely. This prevents the bottoms from becoming soft and soggy.
- Make the royal icing:
- In a large bowl, combine the sifted powdered sugar, meringue powder, vanilla extract, and four tablespoons of warm water. Beat on low speed with an electric mixer until the icing is smooth and glossy, then add more water one teaspoon at a time if you need to loosen it.
- Tint and divide:
- If decorating with color, divide the icing into separate bowls and add gel food coloring drop by drop until you reach your desired shade. Keep unused icing covered with a damp cloth so it doesn't crust over.
- Decorate and set:
- Using piping bags or squeeze bottles, decorate your fully cooled cookies with royal icing in whatever patterns feel right to you. Let the icing set completely at room temperature, which usually takes a few hours, before stacking or storing.
 Save
Save There was a quiet moment while decorating when I realized I'd made enough cookies to fill an entire box, and instead of feeling like work, it felt meditative. The repetition of piping blue lines and white accents became less about the task and more about the intention behind it—these cookies were going to mean something to the people who received them.
Why This Dough Works So Well
The ratio of butter to sugar to flour in this recipe lands in that sweet spot where the cookies spread just enough to bake evenly without disappearing into thin lace. The egg and milk add moisture without making the dough sticky or difficult to handle, and the small amount of baking powder gives just enough lift to create a tender crumb. I've made dozens of sugar cookie recipes over the years, and this one consistently delivers cookies that are sturdy enough to decorate but soft enough that they don't feel like stale shortbread.
The Royal Icing Secret
Royal icing looks intimidating until you understand that it's really just powdered sugar, meringue powder, and water in the right proportions. The meringue powder is what separates this from homemade icing that stays soft—it stabilizes the mixture and helps it dry to a hard, glossy finish. The first time you see your cookies transform from plain to gallery-worthy with a coat of icing is honestly a small kitchen magic moment.
Decorating Like You Mean It
The best part about these cookies is that they don't demand perfection in decoration—they're forgiving canvases. You can pipe thin outlines, flood the centers with color, add dots, or just do simple stripes and they'll all look intentional and beautiful. I keep gel food coloring in blue, white, yellow, and sometimes a pale pink on hand, which lets me color-match these to any theme or mood without overthinking it.
- Start with one piping bag and one color so you don't feel rushed or overwhelmed by options.
- If you mess up a line, let the icing set and pipe over it with another color—mistakes become happy accidents or intentional layering.
- Make extra icing so you're not stressed about running out partway through decorating.
 Save
Save These cookies have become my answer to the question of what to bake when you want to make something that feels special but doesn't actually require difficult techniques. Whether you're making them for a themed party or just because the character design made you smile, they're the kind of recipe that reminds you why baking is worth the flour dust and the cleanup.
Recipe FAQs
- → What gives the cookies their vanilla flavor?
The cookies are flavored with pure vanilla extract added to both the dough and the royal icing, lending a rich, aromatic note throughout.
- → How do I achieve the glossy royal icing finish?
Mix powdered sugar, meringue powder, vanilla, and water until smooth and glossy. Adjust water carefully for ideal consistency before coloring and decorating.
- → What is the purpose of chilling the dough?
Chilling firms the dough, making it easier to roll and cut shapes, and helps maintain a tender, crisp texture after baking.
- → Can I customize the icing colors?
Yes, gel food coloring can be added to the royal icing to create a variety of vibrant hues tailored to your desired theme.
- → How should I store the finished cookies?
Store the decorated cookies in an airtight container at room temperature for up to one week to preserve freshness and icing texture.