 Save
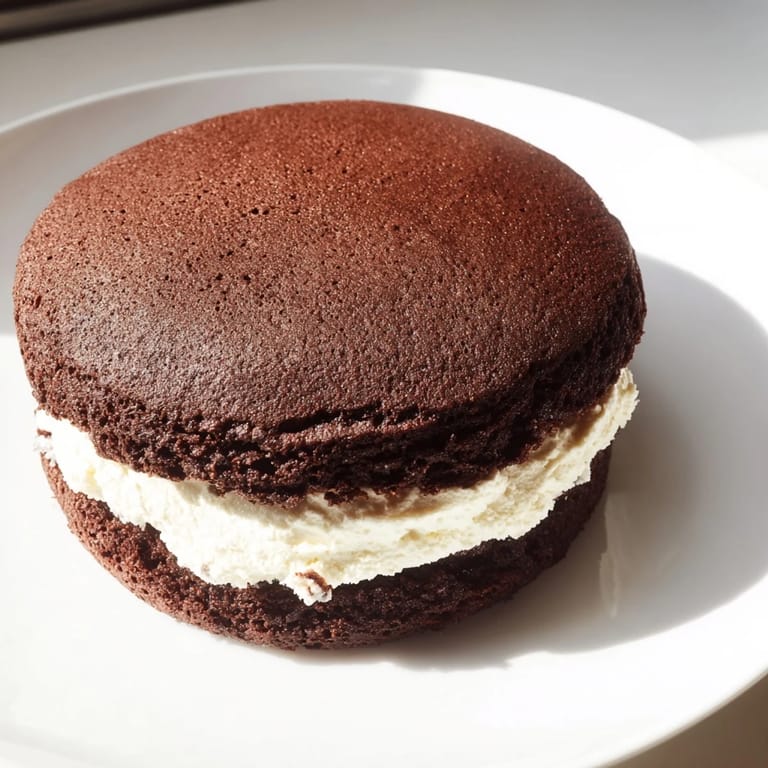
Save My first whoopie pie moment happened at a church bake sale when I was nine, watching an older woman arrange dozens of these chocolate sandwiches on a table while everyone else was setting out brownies. She caught me staring and handed me one without a word, and I bit into something that changed how I thought about desserts—this perfect balance of cake and cream that felt almost too good to be real. Years later, when I finally made them myself, that same magic happened in my kitchen, and I realized these aren't just treats; they're small edible memories wrapped in chocolate.
I made these for my neighbor's daughter's school fundraiser, and watching her face when she bit into one—that pure, uncomplicated joy—reminded me why I love baking. She asked if I'd made them from scratch, and when I said yes, she looked at me like I'd performed actual magic. Now she asks for them by name, and honestly, that's better than any compliment I could get.
Ingredients
- All-purpose flour: Use fresh flour that hasn't been sitting in your pantry forever; old flour can make your cakes dense and sad.
- Unsweetened cocoa powder: This is where your chocolate flavor lives, so don't skimp or use the sweetened kind—it matters.
- Baking soda and baking powder: These two work together to give you that perfect tender crumb, and they're not interchangeable so don't even try.
- Granulated sugar: Keep it simple and let the cocoa shine.
- Unsalted butter and vegetable oil: The combination keeps these cakes moist and tender instead of heavy; using just butter alone will dry them out.
- Eggs: Room temperature eggs mix in more smoothly and help create a lighter batter, so pull them out of the fridge ahead of time.
- Buttermilk: This adds tang and tenderness; if you don't have it, mix regular milk with a splash of lemon juice and let it sit for five minutes.
- Vanilla extract: Real vanilla makes a noticeable difference here, not the imitation stuff.
- Marshmallow creme: This is the secret that makes these taste like the real deal; don't substitute regular marshmallows.
- Powdered sugar: Sift it to break up lumps before mixing, or your filling will have little grains that feel gritty against your teeth.
Tired of Takeout? 🥡
Get 10 meals you can make faster than delivery arrives. Seriously.
One email. No spam. Unsubscribe anytime.
Instructions
- Set your stage:
- Preheat your oven to 350°F and line your baking sheets with parchment paper so your cakes don't stick and you can actually slide them off onto a cooling rack without them falling apart.
- Build your dry base:
- Whisk together the flour, cocoa powder, baking soda, baking powder, and salt in a medium bowl—doing this by hand instead of just dumping it all together means your leavening agents get distributed evenly and your cakes rise predictably.
- Cream it together:
- Beat sugar, softened butter, and oil in a large bowl until the mixture is noticeably lighter in color and fluffy, about three to four minutes; this incorporates air that makes your cakes tender instead of dense. Add your eggs one at a time, making sure each one is fully beaten in before adding the next, then mix in vanilla.
- Bring it all together:
- Alternate between adding your dry ingredients and buttermilk, starting and ending with the dry—this gentle approach prevents overmixing, which would make your cakes tough and chewy. Mix just until you can't see any streaks of flour.
- Portion with confidence:
- Drop two-tablespoon-sized mounds onto your prepared sheets, spacing them about two inches apart; they'll spread a little, so give them room to breathe. A cookie scoop is your friend here for consistency.
- Bake until perfect:
- Bake for 10 to 12 minutes—you'll know they're done when you touch the top lightly and the cake springs back immediately. Let them cool on the sheet for five minutes so they're stable enough to move, then transfer to a cooling rack to cool completely, which takes about 30 minutes.
- Make the magic happen:
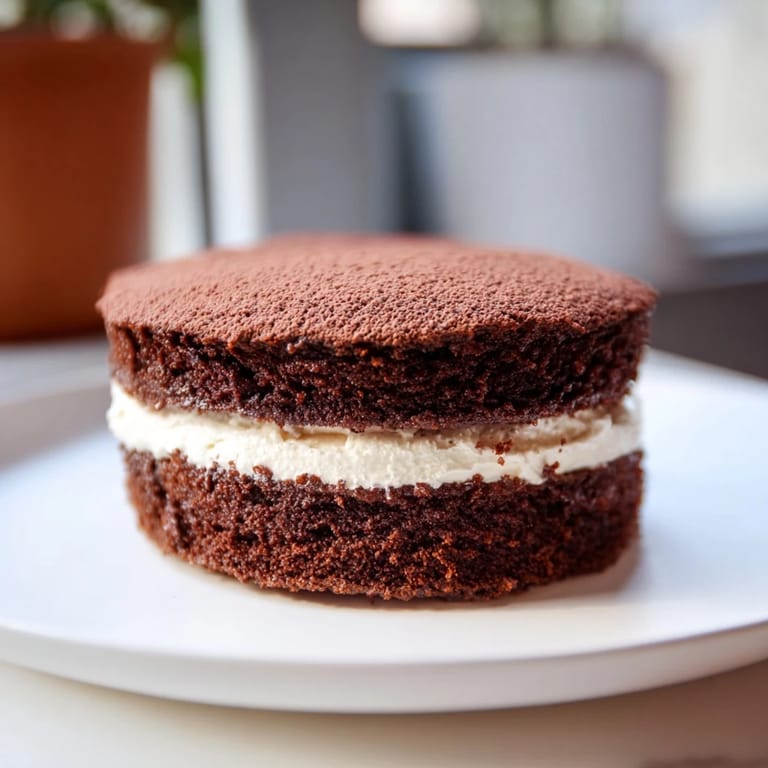
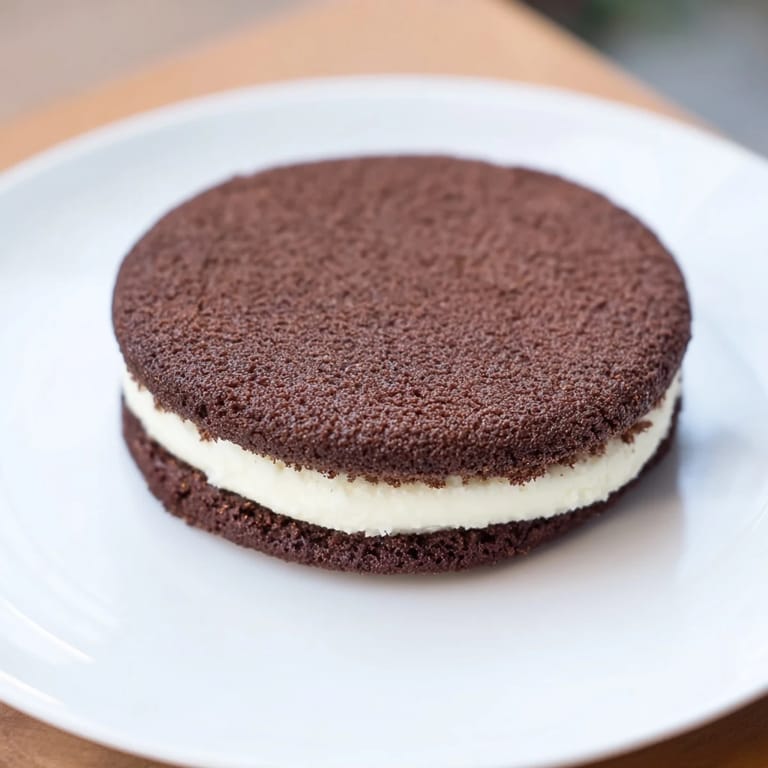
- Beat softened butter until it's smooth and creamy, then gradually add your sifted powdered sugar, mixing as you go to avoid a sugar explosion. Fold in the marshmallow creme, vanilla, and salt, then beat until the filling is fluffy and light—this takes about two to three minutes and transforms the texture completely.
- Sandwich it up:
- Spread or pipe your filling onto the flat side of half your cooled cakes, then top each with a remaining cake, flat side down. If you're piping, a pastry bag with a large round tip creates a prettier presentation and you'll look like you actually know what you're doing.
- Let it rest:
- Chill for at least 30 minutes before serving so the filling sets and the flavors meld together; this step feels like it shouldn't matter, but it absolutely does.
 Save
Save There's something genuinely special about giving whoopie pies to someone and watching them discover them for the first time, especially if they've never had one before. It's like you're handing them a small piece of Pennsylvania Dutch heritage and comfort all wrapped up in chocolate.
Flavor Variations That Work
Once you master the basic version, you can start playing around and making these your own. I've added a teaspoon of espresso powder to the cake batter and it deepens the chocolate flavor in a way that feels sophisticated without being obvious—people can't quite put their finger on why these taste better than store-bought ones, but they feel it. Some bakers use half shortening and half butter in the filling for a more authentic old-school texture, and honestly, that combination is unbeatable if you want that classic, almost vintage taste that takes you back to church socials and diners.
Storage and Make-Ahead Magic
The beautiful thing about whoopie pies is that they actually taste better the next day once the flavors have had time to settle and get to know each other. Store them in an airtight container at room temperature for up to three days, and they'll be just as good on day three as they were on day one. If you want to get ahead for parties or gifts, you can make the cakes a day early and store them unfilled, then assemble them the morning of serving and they'll be perfect by the time you need them.
Small Details That Make the Difference
Whoopie pie success really comes down to understanding the relationship between your ingredients and what you're trying to create. The oil and butter combination keeps things moist, the buttermilk adds subtle tang, and the marshmallow creme in the filling is what makes these taste unmistakably like the real thing. These details might sound small, but they're the difference between making something forgettable and making something someone asks you to bring to every gathering for the next five years.
- If you don't have buttermilk, make a substitute by mixing one cup of regular milk with a tablespoon of lemon juice and letting it sit for five minutes until it's thickened and tangy.
- Use a cookie scoop for the batter so every cake is roughly the same size and they all bake in the same amount of time.
- Let the filled whoopie pies sit at room temperature for about 30 minutes before serving so the filling isn't cold and firm, but soft and pleasant to bite through.
 Save
Save Making whoopie pies is one of those small kitchen rituals that somehow feels bigger than it actually is. There's something about creating these little chocolate sandwiches that makes you feel connected to generations of bakers and families who've been doing the same thing for decades.
Recipe FAQs
- → What ingredients make the cakes soft and moist?
The combination of vegetable oil, buttermilk, and butter in the batter keeps the cakes tender and moist.
- → How is the vanilla cream filling prepared?
Butter is beaten smooth, then powdered sugar, marshmallow creme, vanilla extract, and a pinch of salt are gradually added and whipped until fluffy.
- → Can the cakes be stored and for how long?
Store in an airtight container at room temperature for up to three days to maintain freshness.
- → What baking tools are recommended for making these sandwiches?
Use an electric mixer for batter and filling, baking sheets lined with parchment paper, and a cooling rack for best results.
- → How does adding espresso powder affect the flavor?
Espresso powder enhances the depth of chocolate flavor without adding a coffee taste.