 Save
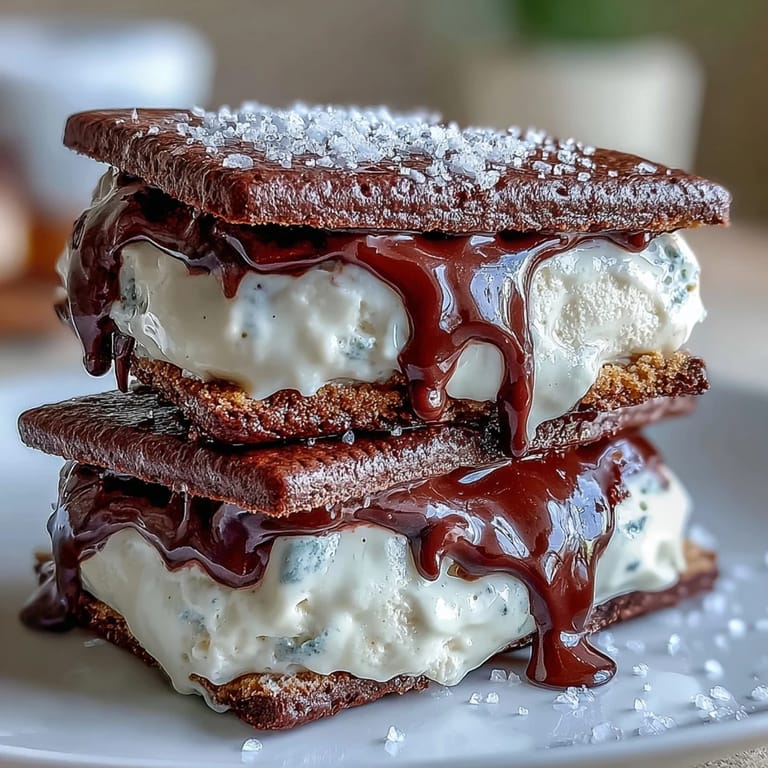
Save There's something about the afternoon slump that makes you crave something cold and indulgent, and one summer I found myself staring at a vanilla frappuccino thinking, why not turn this into something I can hold in my hand? That's when these ice cream sandwiches were born, combining the rich espresso notes of a café drink with creamy vanilla ice cream tucked between soft, slightly fudgy cookies. My kitchen smelled like a coffee shop had collided with a bakery, and honestly, I wasn't mad about it.
I made these for a dinner party on a sweltering evening when nobody wanted a hot dessert, and watching my guests' faces light up when they bit into that first sandwich—the way the espresso cookie gave way to creamy vanilla—made every minute of prep worth it. Someone asked if I'd bought them from a fancy place, and I got to have that small, satisfying moment of saying I'd made them myself.
Ingredients
- Unsalted butter (1 cup, softened): Room temperature butter creams better and gives you that light, fluffy base that keeps the cookies tender even after they freeze.
- Light and granulated sugar (1 cup combined): The mix of brown and white sugar adds moisture and depth; brown sugar especially keeps things chewy.
- Large eggs (2): They bind everything and add richness, so use fresh eggs at room temperature for better mixing.
- Instant espresso powder (2 tbsp): This is the secret—it's more potent than regular coffee and dissolves into the dough without adding liquid.
- Vanilla extract (1 tsp): A small amount rounds out the espresso flavor instead of fighting with it.
- All-purpose flour (2 cups): Standard flour works perfectly here; no need to get fancy with bread flour or cake flour.
- Unsweetened cocoa powder (1/2 cup): This adds subtle chocolate notes and makes the cookies look like they came from a café.
- Baking soda (1 tsp) and salt (1/2 tsp): Baking soda helps them spread and brown slightly, while salt heightens all the flavors.
- Heavy cream and whole milk (2 cups and 1 cup): The ratio of cream to milk gives you smooth, scoopable ice cream that's not too heavy.
- Granulated sugar (3/4 cup for ice cream): Keep this separate from the cookie sugar; it sweetens the ice cream base.
- Vanilla bean (1 whole, split and scraped): Those tiny black seeds are what make it special, but vanilla bean paste works just fine if whole beans aren't in your budget.
- Pinch of salt: Even in ice cream, salt makes vanilla taste more like vanilla.
Tired of Takeout? 🥡
Get 10 meals you can make faster than delivery arrives. Seriously.
One email. No spam. Unsubscribe anytime.
Instructions
- Get your oven ready and think ahead:
- Preheat to 350°F and line your baking sheets with parchment paper so you're not scrambling when dough is ready to bake.
- Cream butter and sugars until fluffy:
- This takes about 3 to 4 minutes with an electric mixer—you want it pale and light, which traps air and makes cookies tender. Stop and scrape the bowl halfway through so everything mixes evenly.
- Add eggs and flavorings carefully:
- Beat in one egg at a time so it actually incorporates instead of just sitting there. Once you add the espresso powder and vanilla, beat for another 30 seconds to distribute them throughout.
- Combine your dry ingredients separately:
- Whisking flour, cocoa powder, baking soda, and salt together prevents lumps and ensures the espresso powder spreads evenly. This step saves frustration later.
- Mix wet and dry together gently:
- Add the dry mixture to the creamed mixture in two or three additions, stirring just until combined. Overworking makes cookies tough, which is the opposite of what you want.
- Scoop and flatten the dough:
- Use a cookie scoop or rounded tablespoon for uniform size, then gently press each mound with your palm so they bake evenly. Space them 2 inches apart because they'll spread a bit.
- Bake until just set but still soft:
- 10 to 12 minutes is key—they should look slightly underbaked because they'll set as they cool and stay chewy instead of becoming hard. Let them cool completely on the wire rack so the texture sets properly.
- Make the ice cream base while cookies cool:
- Combine cream, milk, sugar, vanilla bean seeds, and salt in a saucepan and heat gently until steaming but not boiling. You'll see the sugar dissolve and smell that pure vanilla aroma—that's when you know it's ready.
- Cool the mixture completely before churning:
- Warm base doesn't churn properly, so either let it sit at room temperature for 20 minutes or speed things up by chilling it in the fridge for 30 minutes.
- Churn according to your ice cream maker's instructions:
- Every machine is different, but generally you're looking at 20 to 30 minutes of churning until it reaches soft-serve consistency. Transfer to a freezer container and freeze solid, about 2 hours.
- Assemble with a gentle hand:
- Place a scoop of ice cream on the flat side of one cookie, top with a second cookie, and press gently together—no need to squeeze hard. If the ice cream is too soft, pop it back in the freezer for 10 minutes.
- Freeze assembled sandwiches before serving:
- At least 30 minutes in the freezer firms up the ice cream and lets everything set together properly. This makes them easier to handle and gives you that perfect bite.
 Save
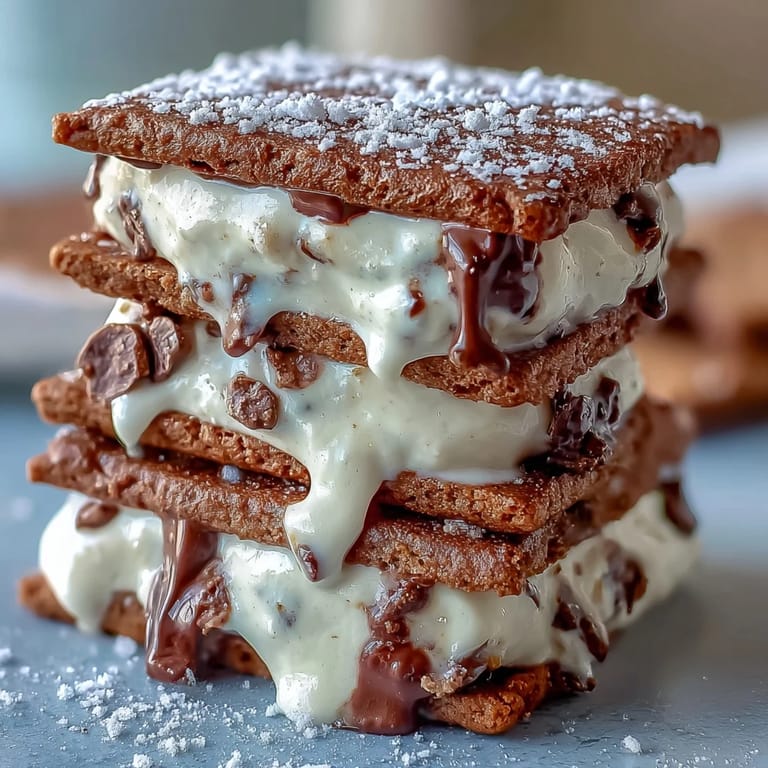
Save What started as an afternoon experiment became something I make whenever I want to feel like I've treated myself without leaving home. There's a quiet joy in biting through that soft coffee cookie into cold, speckled vanilla, and knowing you made the whole thing from scratch.
Why Coffee and Vanilla Work So Well Together
Coffee doesn't overpower vanilla the way some flavors do—instead, it wakes it up and makes it taste more complex. When you taste both at once, the vanilla becomes rounder and richer, and the coffee loses any harshness. It's like they were meant to be neighbors, not competitors.
Making Ice Cream Without a Machine
Life happens, and sometimes you don't have an ice cream maker sitting in your kitchen—I didn't for years. High-quality store-bought vanilla bean ice cream works beautifully here and takes away the longest part of the process. The homemade cookies are still what make these special, so don't let the lack of one piece of equipment stop you from making them.
Storage, Upgrades, and Last-Minute Ideas
These sandwiches keep in an airtight freezer container for up to two weeks, which means you can make them ahead for guests or just for yourself on a random Tuesday when you need something special. If you want to get fancy, roll the edges in mini chocolate chips or crushed espresso beans right after assembling—it adds texture and looks intentional. One last thought: if your cookies spread too thin during baking, they're still delicious eaten with a spoon as a coffee-flavored crumble over vanilla ice cream.
- Make extra cookies even if you think you won't need them, because they disappear faster than expected.
- Store cookies and ice cream separately until assembly if you're making these more than a day ahead.
- Let assembled sandwiches sit on the counter for 2 to 3 minutes before eating if they come straight from the freezer—it makes them easier to bite without your teeth getting cold.
 Save
Save These vanilla bean frappuccino ice cream sandwiches turn a café craving into something you can make at home, share with people you like, and feel genuinely proud of. Every bite reminds you why homemade frozen treats deserve a spot in your regular rotation.
Recipe FAQs
- → What type of coffee is used in the cookies?
Instant espresso powder is used to impart a robust coffee flavor without adding liquid, ensuring the cookies retain their soft texture.
- → Can I use store-bought ice cream instead of homemade?
Yes, high-quality vanilla bean ice cream can be used directly for convenience and still deliver great flavor.
- → What is the best way to store these sandwiches?
Store in an airtight container in the freezer to keep them fresh for up to two weeks.
- → How do I achieve soft yet sturdy cookies?
Carefully baking the coffee cookies until just set but still soft and cooling them on a wire rack helps maintain the ideal texture.
- → Are there optional add-ons for extra texture?
Yes, rolling the edges in mini chocolate chips or crushed espresso beans adds a lovely crunch and flavor boost.